Last time, I shared the initial stages of a full bathroom renovation in a 1970s home. As the sole bathroom in the house, time was of the essence, and staying on schedule was crucial to avoid the wrath of the family! This blog post is all about catching up, focusing on getting the floor prepped, installing the underfloor heating, and exploring a unique wall panelling solution.
Laying the Groundwork: Preparing the Floor
I started by reinstating the bath temporarily to mark the tiling boundary on the floor. The goal was to tile up to the bath’s edge, but before tiling, underfloor heating needed to be installed. Crucially, the heating mat shouldn’t extend under the bath itself.
Next, the timber floor was primed using a sealant. This creates an adhesive layer, ensuring the tile adhesive bonds effectively. A large brush made quick work of this task, applying an even layer that dries to a slightly blue, tacky finish. This step, though simple, is fundamental for a lasting renovation, especially in a high-moisture environment like a bathroom in Blackpool.
Day Five: Insulation and Underfloor Heating Installation
Day five felt like a turning point. To provide insulation and a smooth surface for the underfloor heating mat, 6mm insulation tile backerboards were used. These boards serve a dual purpose: they create an even base and prevent heat from escaping downwards into the timber floor.
The boards were carefully cut and dry-laid in a brick pattern to stagger the joints for enhanced structural integrity. A flexible tile adhesive was then mixed and applied with a 6mm notched trowel to create an even bed. Once laid, the boards were pressed firmly into the adhesive, ensuring they were level. After a couple of hours, the boards were further secured using washers and screws, spaced approximately 300mm apart. This “glued and screwed” approach guarantees a solid foundation for the tiles and underfloor heating.
Thermosphere Underfloor Heating System
Next up was the installation of a Thermosphere underfloor heating system. Before even unrolling the mat, a resistance test was performed using a multimeter to check for any damage. This simple test can save a lot of hassle later on. The instructions that came with the mat details the numbers to check against, it is worth the time to read them.
Following the provided layout guides, the mat was carefully unrolled, avoiding areas under the vanity unit and toilet. It’s important to maintain a 50mm gap from the walls and between the heating cables. At various intervals the mat had to be cut to change direction, which was no problem at all, the cut mat was stuck down using the sticky strips on the reverse side. The most crucial part of this process is to avoid cutting the heating cables themselves.
A small channel was then routed into the insulation backerboard to embed the floor sensor. The sensor must be positioned between two heating wires. The sensor cable was routed up to where the thermostat will eventually be installed. With everything in place, the heating mat was then secured to the insulation backerboard by peeling back the film and sticking it down.
To protect the wires, they were also routed into the wall and secured with banding. A final resistance test was conducted to confirm that the mat hadn’t been damaged during installation.
Self-Levelling Compound
With the underfloor heating in place, a self-levelling compound was applied to create a perfectly smooth surface for tiling. Expanding foam was used to prevent the compound from flowing under the bath. The self-levelling compound was mixed with water to a smooth consistency and left to stand for five minutes before application.
The compound was poured over the mat and spread evenly using a plasterer’s trowel. A spiked roller was then used to remove any air bubbles and ensure a level finish. Even with the self-levelling compound, always conduct another resistance test before proceeding.
Day Six: Tiling the Floor
By day six, the self-levelling compound was dry, and it was time to tile the floor. For more detailed information on this, I have created a separate video.
Innovative Wall Panelling Solution: Cement Grey Fibreboard
With limited time to complete the bathroom renovation, an alternative to traditional tiling was explored: cement grey fibreboard. This solid plywood board, designed specifically for bathrooms, offers a quicker installation process. As long as the underlying walls are sound, the fibreboard can be applied directly over existing surfaces.
Although the fibreboard costs more than tiles, the time savings it offers are invaluable. These boards were manufactured by a company – these boards provide a modern, waterproof finish in a fraction of the time.
The installation process begins with precise measurements, especially when fitting the boards around corners or obstacles like radiator pipes. For external corners, aluminium trims are used, cut to size using a multi-material blade. When cutting the fibreboard, it’s crucial to measure multiple times and cut once to ensure accuracy.
Radiator pipes require careful marking and cutting using a hole saw. The boards are designed with a male-female tongue and groove system, which creates a seamless, waterproof joint. A bead of silicone is applied along the male tongue to seal the boards, particularly in the shower area. This prevents water from penetrating the joint and damaging the laminated surface.
A hybrid polymer adhesive is used to secure the boards to the wall. The adhesive is applied in thick beads to ensure a strong bond. The board is then tipped into place and tapped to engage the click-lock system. Any excess silicone that squeezes out is removed using a silicone tool and water, resulting in a perfectly sealed, seamless finish.
For internal corners, a bead of thick, clear silicone is applied to create a waterproof seal. This method provides two layers of protection against water damage.
Day Eight and Nine: Completion and Sealing
By day eight, the bulk of the wall panelling was complete. Day nine was dedicated to applying silicone sealant around the walls, floors, and bath. This ensures a professional finish and prevents water damage.
Final Thoughts
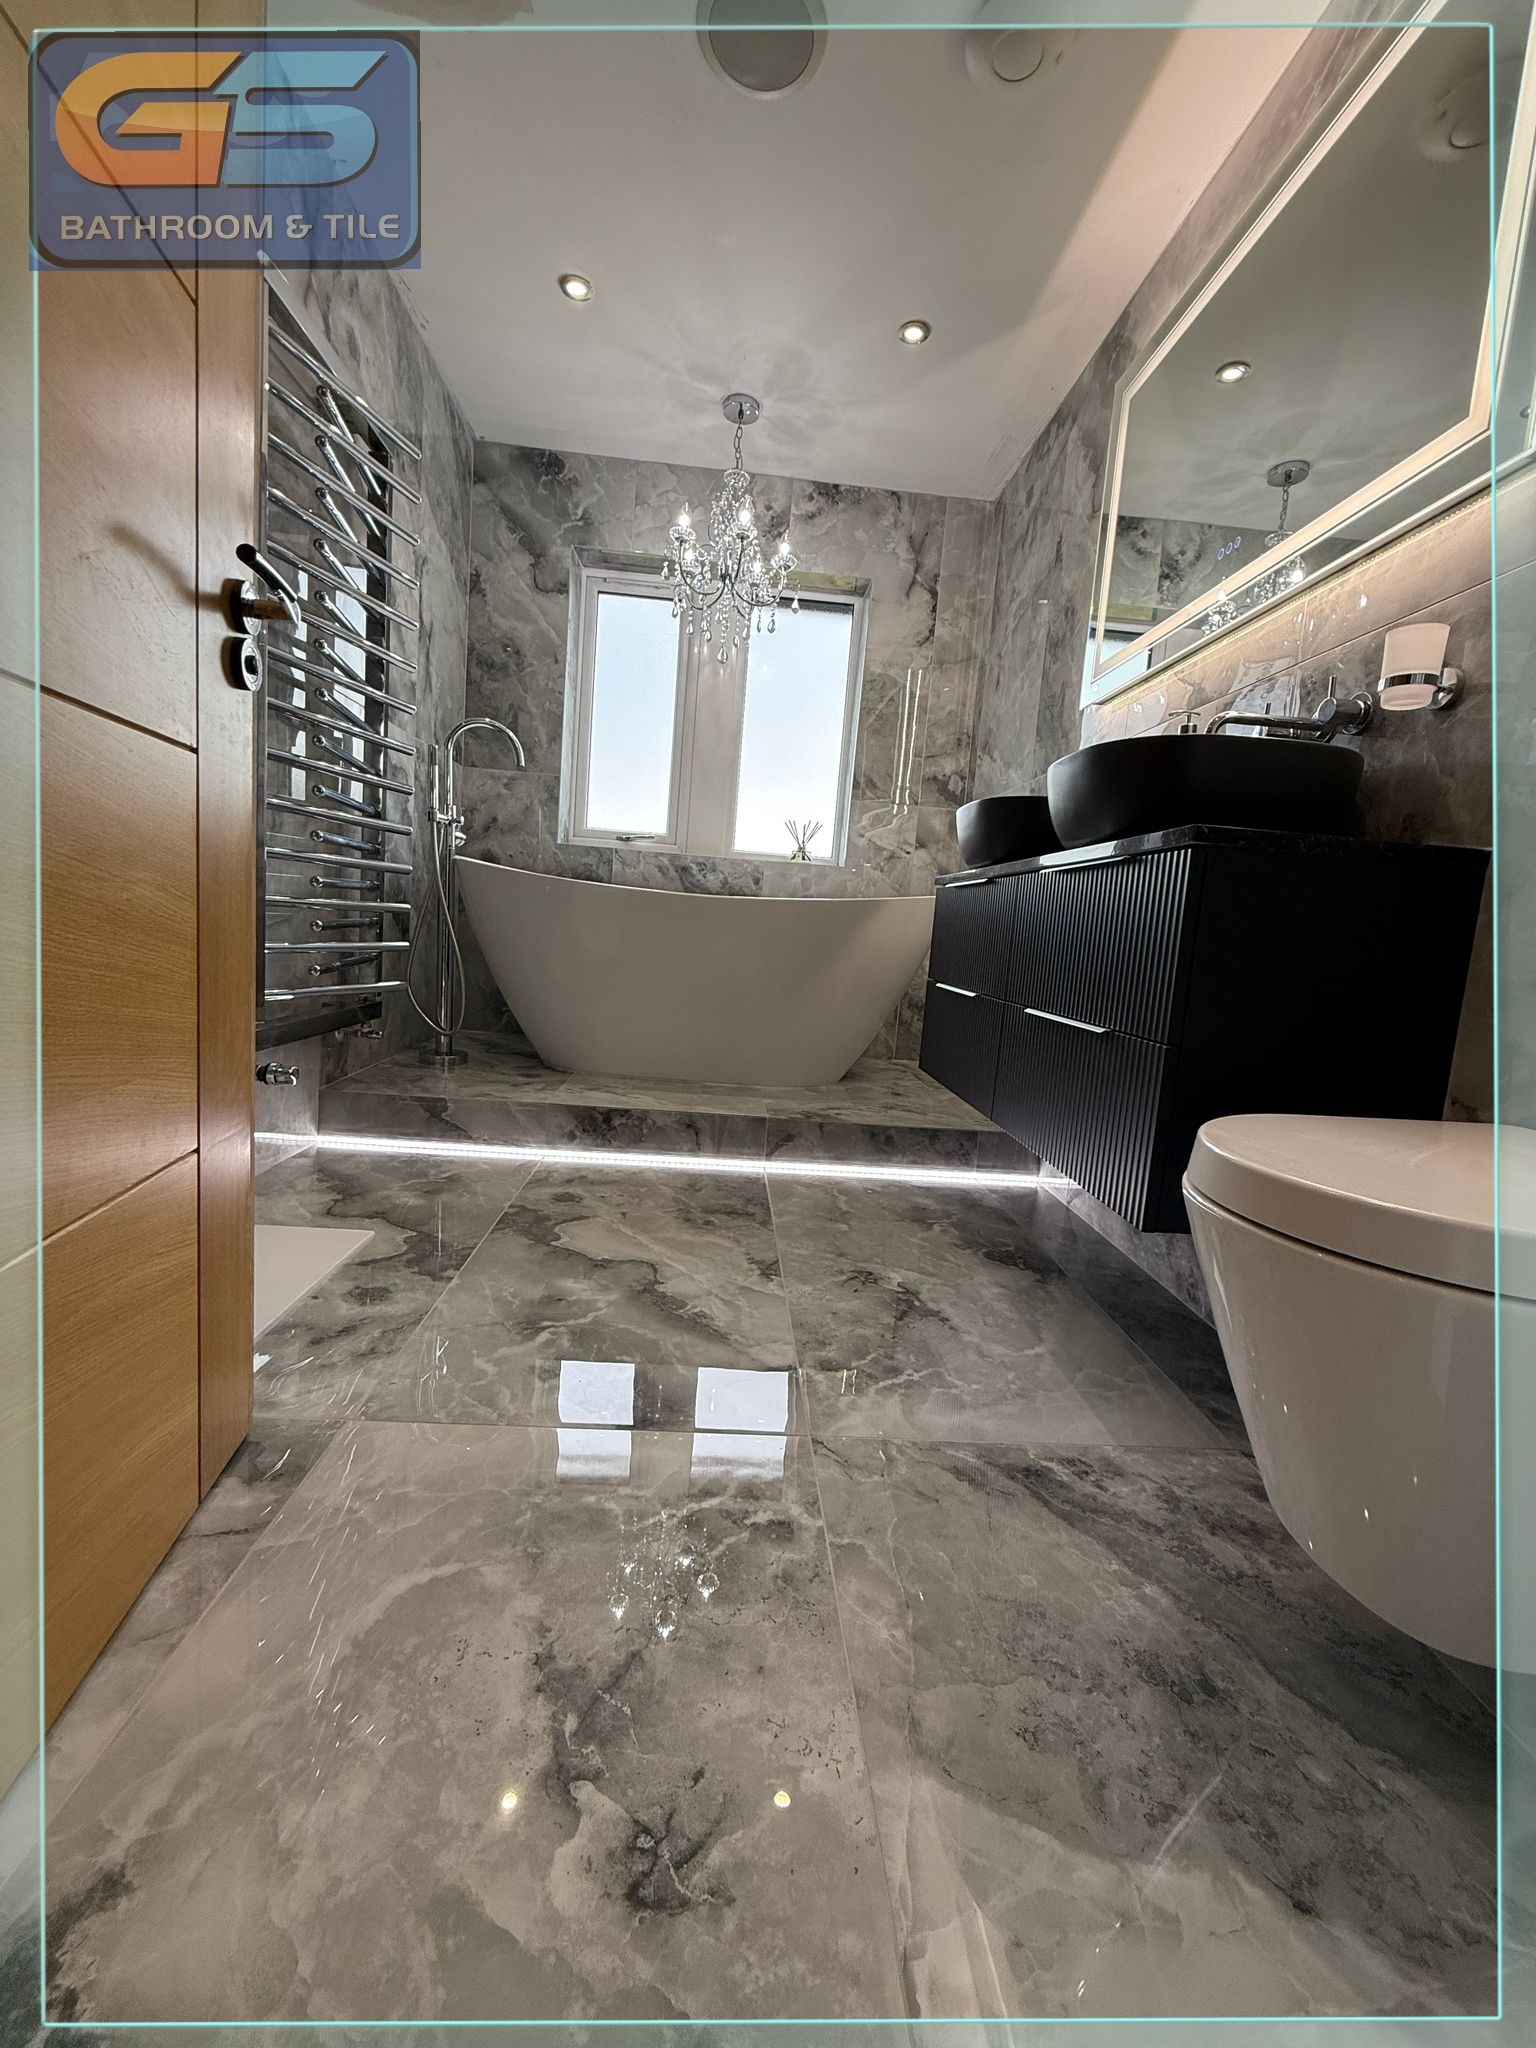
Renovating a bathroom is no easy feat. From laying the groundwork with insulation backerboards to installing underfloor heating and experimenting with innovative wall panelling solutions, each step requires careful planning and execution. This project demonstrates that with the right materials and techniques, it’s possible to achieve a stunning bathroom transformation in a limited timeframe. Stay tuned for the final episode, where I’ll reveal the finished bathroom and discuss the costs involved in this renovation!